Showing posts with label Crafts. Show all posts

Sunday, December 12, 2010

Paperback Wreather

Our Holiday Wreath, made from a recycled paperback book
Yes. I'm a librarian and I tear books. I used discarded books, of course (see more on that, here) and luckily, I have easy access to lots of discarded books! Aside from books, I started with a styrofoam ring and some super hot glue.
Making a wreath
The glue was hot. Super hot. I ended burning quite a few fingers in the process! I was warned... the actual idea, along with the warning came from the Living with Lindsay blog. Great idea, right? I just added a red bow to ours, to make it especially festive.
Our Holiday Wreath, made from a recycled paperback book
I've already got compliments from the neighbors!

More holiday crafts and baking on their way...

Thursday, December 02, 2010

Recycled Book Christmas Garland

iphone_pic
We recently had a huge book sale over at the library. Many things were sold, many things were donated, and some things were candidates for the trash - or in my case, my craft cabinet. Lucky for me there were boxes of promotional copies of the Harlequin Romance Mystery, Crime Scene at Cardwell Ranch for my crafting pleasure. The best part is that the text is available online in full pdf here, so it's free of any librarian-cutting-into-books guilt.
Christmas Book garland
I started the garland with cutting multiple strips of the text, approximately 1" thick. I tried to cut off the edges which had no text, just to keep the garland visually full of text. Because my tree has a red bow on top, I decided to string the garland with red embroidery floss, just to give it that extra pop of color.
Christmas Book garland
I loosely folded my strip of text in a wavy "s" pattern, then started to thread it, one wavy strip at a time.
Christmas Book garland
I tried to keep the tightness of the garland somewhat random, but loose enough so that the red thread would show through.
Christmas Book garland
Just a note, I am completely excited about Christmas this year. December just started, but we already have 3 trees (and we're still getting one more...)! Very festive in the Young household, so expect an array of holiday posts this month.

Tuesday, October 12, 2010

Wedding Craft #9: Bow Napkins

While I was preparing sparkly meringues, my best friend Junko, was on my living room floor folding 200+ napkins into adorable bows.
Bow Napkins
Junko folded the napkins, then wrapped a piece of fabric ribbon around the middle and taped the ribbon in the back, to make these sweet little bows (below image by Our Labor of Love).
Bow Napkins and Jam.
They looked perfect with our homemade jam favors!

Up next: Wedding Craft #10: Quilt Guestbook

Sunday, October 10, 2010

Wedding Craft #7: Wedding Cake Topper

I realize I've been missing on the blog scene for a while. Let me tell you friends, lots has happened. I got a new job and it's been pretty great. I love what I do. Being a librarian is really fun! Really! It's been an intense few months settling in, but I think I'm finally ready to throw myself back into blogging and crafting again. And now the long awaited wedding craft #7! It's a really funny story actually. I was really touched when my mom gave me her own wedding topper to use for my wedding. She had been saving it in a box with her wedding dress, her veil, and other wedding memories.
Cake Topper, in progress
This is what it looked like when my mom gave it to me. I loved it, but I have to admit, the fabric around the bride's dress and the dingy white base wasn't ideal - but it was my mother's, so I couldn't change it. I mean, this is the same exact wedding cake topper that my parents used on their own wedding cake! Right? Wrong! Yes, wrong! So, for 1 year, I held onto my mom's cake topper, as-is. Then, only weeks before the wedding, I was looking through my parent's wedding album and discovered that their cake had a completely different topper! I'm not sure why my mom held onto this cake topper or for that matter, what happened to her actual cake topper? Either way, this was my green light to make some guilt-free changes.
Cake Topper, in progress
I wanted to work on the base of the cake first, so I wrapped the rest of the topper in foil and some tape.
Cake Topper, in progress
I then applied lots of glue and lots of sparkles.
Cake Topper, in progress
Gold sparkles cover the entire base of the new topper, which helped inspire the design of the wedding cake.
Cake Topper, in progress
Here the topper is, almost done, but not quite yet.
Finished Cake Topper
I added a small veil and removed the fabric on the bottom of the dress and it was all ready! Below are a few photos by our photographers, Our Labor of Love, from the wedding day.
Our wedding cake
The gold glitter from the base inspired the gold glitter sprinkles around our big pink cake.
Our wedding cake
And just in case anyone was wondering, our cake (made by Sweet & Saucy Shop) was delicious!
Our wedding cake
In fact, our entire dessert table was pretty grand.
Our dessert table

Up next: Wedding Craft #8: Sparkly Meringues

Monday, August 16, 2010

Wedding Craft #6: Ring Boy Pillow

Andrew, our ring boy
I have the greatest nephew, ever. He's super cute and knows everything and anything about dinosaurs. He loves himself some T-Rex, but he also really loves being a "good boy" and taking on lots of responsibility. He took his duties as ring boy very seriously. Holding onto a pillow with our rings was not a joke for Andrew, he was extremely focused and ready to protect these rings and the pillow. I made the pillow using vintage handkerchiefs, from the same batch of hankies I used to make our invites.
Ring Boy Pillow
First, I sewed a piece of vintage ribbon in the middle of one of the hankies. I then sewed the two hankies together, leaving room to stuff the pillow. After stuffing the pillow, I sewed it shut, and that was it! Super easy! It looked real cute with Andrew's snappy outfit too!
Andrew & Alex
Here he is, pictured with my sister (his mama). Thanks for all the good work, Andrew!

Up next: Wedding Craft #7: Wedding Cake Topper

**Photographs by Our Labor of Love

Friday, July 23, 2010

New Curtain

It was easy, less than $10, and all done in under 30 minutes!
Curtain, after
Our curtain wasn't always so cheerful and bright. When we moved in, this is what we were given:
Before
Since I spend so much time in this kitchen, I wanted something a little happier. I went with this bright blue fabric, to go with our blue Kitchenaid products.
Fabric for new curtain
After I measured, I ironed..
Ironing and pinning
...and pinned...
Pinning
... and sewed...
Sewing
...and done. I used a yellow thread to contrast, since we use mostly yellow dish cloths.
Curtain close up
A quick fix under 30 minutes and for under $10!

Saturday, August 15, 2009

Taking It To The Street

Last May, I received the prettiest Orchid from Brian's sister. I had noticed recently the blossoms started to look a bit sad, one by one, they were dropping. On Friday, it finally happened. They last bit of blossoms were frowning.
My orchid is dying.
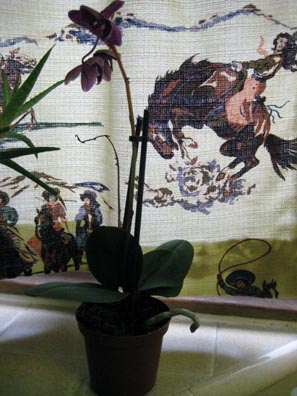
I was so confused, because I followed all the instructions on how to care for Orchids! At closer inspection, I came to a realization.
It was so clear!
Orchid roots at the surface..
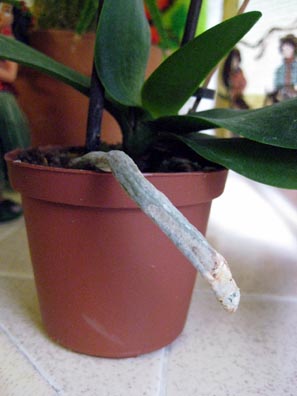
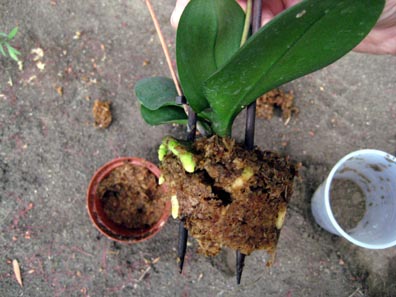
All of the roots were above the soil! Some were even out of the pot! How could I be so oblivious?
Orchid roots at the surface..
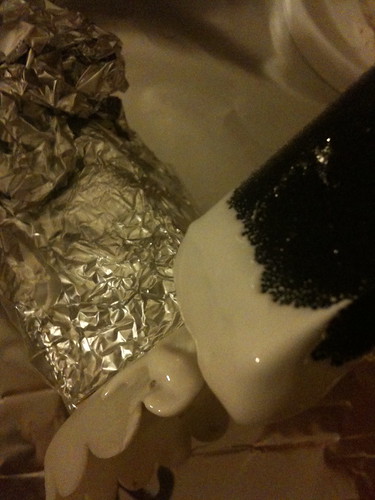
I had to make a last attempt to save the Orchids! So, I trimmed the roots and decided to re-pot. Though, I didn't really have a handy pot around, one with holes to let water drain through. So, I improvised!
What was a cup before...
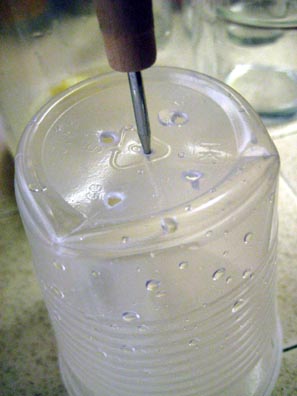
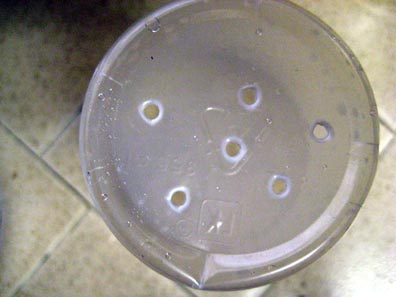
This cup just happened to be sitting on my counter, a water cup from a fast food restaurant. I figured, why not recycle it? I got my handy awl and poked a few holes.
Using an awl to make wholes in this cup to make it a recycled new flower pot
All ready for some dirt!
Recycled new flower pot
What next? Taking it to the street! That's right, taking it to the street! Time to get the hands a little dirty. Now, I'm not really sure if this regular dirt will cut it, but it's all I had.
Taking it to the streets
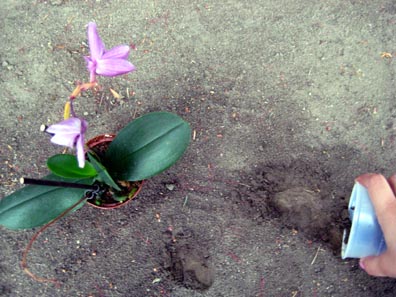
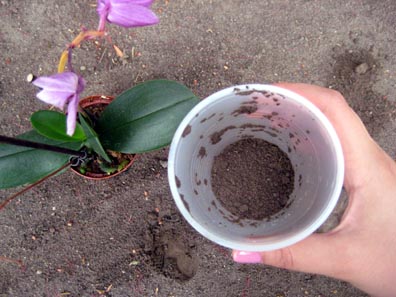
I didn't really have any potting soil at home, so I just went around the corner and found a spot with some dirt. I needed to work quickly, if I wanted to save the plant! I put a little dirt on the bottom.
A little bit of dirt...
Then, removed the Orchid from it's previous pot....
Orchid roots
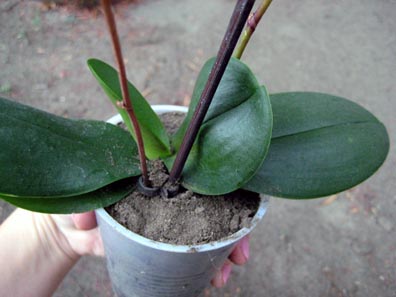
...placed her in her new home...
Orchid in her new home
... and made sure to top her roots off with some more dirt.
Dirt to the brim
It was fun taking my little craft out for a walk. I had a mini exploration session and found this cutie!
Lone Mushroom
It was pretty fun! Eventually, I brought little Orchid back home, to her new spot and sprinkled the top with a little bit of water.
Orchid in her new home
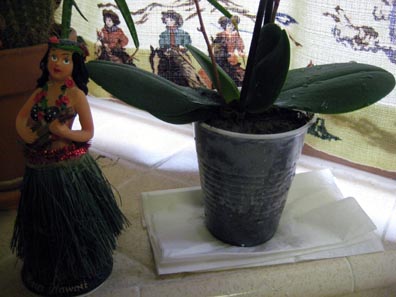
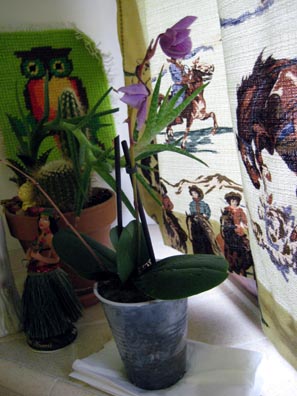
I'm not sure if she'll make it, but here's hoping! She had a good run... either way!
Orchid in her new home

Monday, November 17, 2008

The Felt Club Aftermath

Thanks to all of those who came out to visit Felt Club yesterday! And a special thanks to Jenny who put the whole thing together! It was such a great time! And it was also the reason for my lack of blog updates! I was so busy doing all of this..
My booth at Felt Club!
There's my little booth right before doors opened! I'm glad to say that it was a lot emptier by the end of the night, making clean up a breeze! I was pretty excited to feature a few brand new products on my booth, like these 3am tote bags!
Tote bags that I sewed a few hours before Felt Club started...
Why 3am? Because that's what time I started sewing them.. 3am, a few hours before Felt Club opened doors. Yep. I was also very relieved to finally be done with the librarian embroidery kits that I've been working on since almost exactly a year ago today. I'm kind of embarrassed it took me so long to put these out! But, they're out! And I'm really happy with how they look, so I think they are worth the long wait!
My booth at Felt Club!
These embroidery patterns, along with a few other items from my booth will soon be appearing on my Etsy shop hopefully some time this week. Needless to say, I am exhausted and feeling a bit of a bug, so I am home from work today. Thanks again to all of those who stopped by to say hi, it was great meeting with everyone, especially those who read the blog and/or have purchased items from me in the past and have enjoyed them over the years. It's always nice to get that extra motivation to keep crafting!

Sunday, November 16, 2008

Felt Club!

The reason for my lack of updates is as follows:
Felt Club is THIS Sunday!
I'll be a vendor there in a few hours... I'm pulling an all-nighter for the second night in a row! I hope my zombie face won't scare away shoppers! I've taken pictures of most of the new things I have created, but for now, I will continue to craft until it's time to go... everyone come please stop by and say hi! I promise not to eat anyone's brains, even if I look like zombie girl!

Sunday, October 05, 2008

More Fun With Construction Paper, Scissors, Scotch Tape, Staples, And Glue Stick

Before I move on to a new branch library, I had one more day to begin and complete mural #2! I had a general idea when I got there yesterday, but that evolved into something a little more involved than I originally imagined. I wanted to keep this wall simple, since I only had about 8 hours to complete it, but in a lot of ways, it became extremely detailed. I had a whole new blank slate to work with.
Wall #2
This board is even longer in length and width than the first wall I completed. Before I got to the library, I decided that I'd go for a plain black background, since the blue squares were a little time consuming. When I started setting up, I noticed that a lot of the characters that are going on the wall had black hair. This was a dilemma, because I didn't want the hair to fade in with the background. So, I decided to give the middle the blue square treatment and the edges a black border.
Wall #2 Background progress
Strangely, it went by super quick and I was able to finish the background in no time.
Wall #2 Background complete
I also had the kid's heads ready, but what took forever was making the kids books!
Wall #2 Kids in progress
I made 8 different kid's book covers yesterday, and I'm still not finished with them. I want to add little white page flaps to the inside. And when that's done, there's still more! Luckily, they extended my stay at this branch, so I have more time to finish before I move to the next. More progress to come!