Saturday, July 31, 2010

Wedding Craft #4: Chris & Susana's Embroidered "Guest Book"

Greetings from Seattle, WA! We are so happy to be here and to help celebrate the marriage of our friends Chris & Susana today! Since they live approximately 20 hours away from us, there wasn't much we could do to help them plan their special day. However, Susana really wanted something different for their guestbook. She also mentioned something about fabric, having a hanging piece of art, and somehow tying in the fact that she's from Texas, Chris is from California, and they live in Seattle. I kept thinking about ideas for her, then texted her this horrid drawing that I quickly sketched while at work. I thought this might be a cute idea for embroidering this on a fabric, then having people sign it. I think the drawing left them a little skeptical, but the more we talked, the more they liked the idea.
Embroidered "Guest Book" I made, for Chris and Susana's wedding
I embroidered the design onto one large piece of fabric, which people will sign around.
Embroidered "Guest Book" I made, for Chris and Susana's wedding
I was going to put a nice edge on the fabric, but Susan and I decided it might be best to leave the edges of the fabric open, so they can be cut down if needed.
Embroidered "Guest Book" I made, for Chris and Susana's wedding
After guests sign the fabric, we can cut it down and add a decorative edge.
Embroidered "Guest Book" I made, for Chris and Susana's wedding
I'll be sure to post pictures of how the "Guest Book" looks after people sign it too!

Happy Wedding, Chris and Susana!!!

Up next: More wedding crafts from our wedding...

Friday, July 30, 2010

Wedding Craft #3: The Wedding Favors

We really tried to make this wedding as homemade and crafty as possible, so when it came to favors, I knew they had to be homemade, I just didn't know what. After seeing the trend of jars of honey or jam or pickled foods, I knew I wanted little jars of something as the favors. I've always wanted to make homemade jam, so I thought what better time? Now, there were exactly 235 jars of jam made - but I, personally, can only take credit for 21 of these. See, my mom really got into it. She would call me randomly and just let me know that she just made 51 jars of Kumquat jam... or 43 jars of fig. After she was almost done with most of the jam, I insisted on being there to help.
Cherries, for homemade jam
I joined her for making some cherry jam, which all started with pitting lots and lots of cherries.
Cherries, for homemade jam
We didn't really use a specific recipe, other than cherries, sugar, and pectin.
Making cherry jam
We made sure to sterilize the jars before filling them. We ended up with 21 jars of cherry jam. As I looked at my finished work, with stained red cherry hands, I then decided, if mom really wants to make the jam, I'm gonna let mom make the jam. And she did, and I think she had fun.
Jars for homemade jam, wedding favors
I did too... but with the 800 other things I had to do for this wedding, it was nice letting my mom have this one. Once all the jams were made, I wanted a little something extra for the tops of the jars, so I went out and found these gold foil award labels at Office Max. They were perfect for printing a little thank you and our silhouette.
Labels on homemade jam, wedding favors
As I screen printed all of our invites, I also created the screen to screen printed little fabric tops, with Brian and my silhouettes.
screen printed favors and invites
I also purchased little clear round labels to list the jam flavors; however, those just kept falling off the jars. After a while, we started loosing track of which flavors are which, so we gave that idea up quickly. Brian reminded me, "Annette, no one is going to leave our wedding angry because their jam jar has no flavor listed on it..." and I let it go. He was right, of course, I think people really liked the jam - especially when they found out it was homemade.
Homemade jam, wedding favors
We finished the jam decor off by tying the fabric tops on using twine. Who knew twine was so hard to find??? It is! Well, cute twine is anyway... but we finally found a bunch of it and tied it on one by one, as we watched lots of tv. Brian was kind of a rock star at tying twine on jam.
Homemade jam, wedding favors

Brian and I are now on the road, driving up to Seattle to see our dear friends Chris and Susana get married! We're so excited! When I get back home, I'll be blogging about a little wedding craft that I created especially for their wedding!

Up next: Chris & Susana's Wedding Craft

Thursday, July 29, 2010

Wedding Craft #2: The Wedding Invites

I can't tell you all how long I've been dying to post images of the invites that Brian and I created for our wedding. Of course, I seem to have misplaced the memory card which contains images of us creating our little invites! Luckily, I found a few extra invites laying around the house and some pictures from my iPhone. I just couldn't wait any longer to share these!
Our Wedding Invites
We spent a good 1-4 months trying to agree on a font. That was probably the hardest part of this whole process. Once we agreed, it all went fairly smoothly. I had to burn a few YUDU screens to get the letters nice and sharp and that was a bit of a process. Though, that process turned me into a YUDU screen making pro, so it's all good.
The screen I used to print the invites
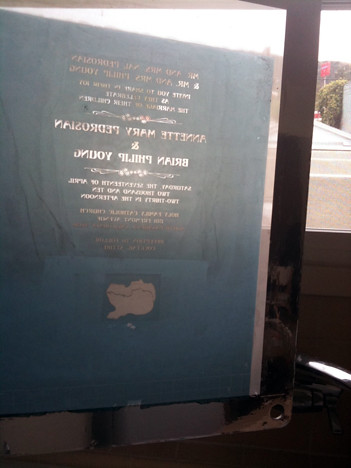
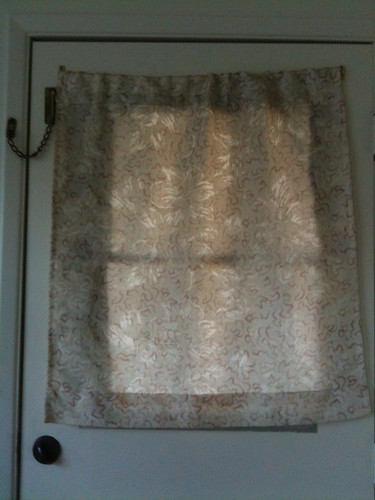
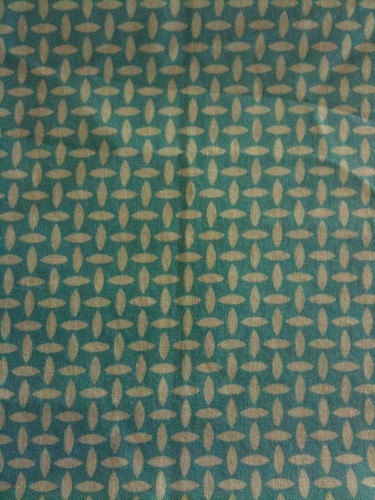
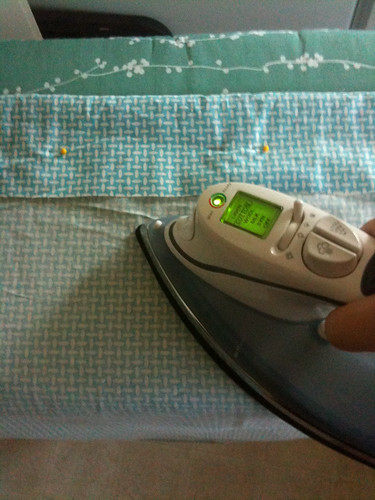
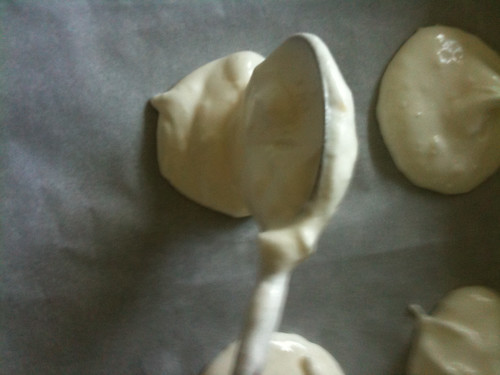
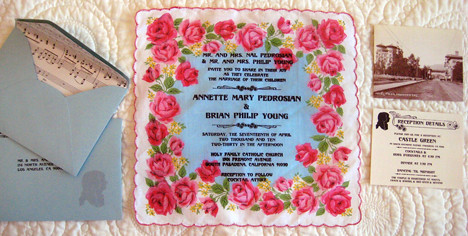
Using the screen above, I screen printed approximately 250 hankie invites. It was fun. Tiring, but fun. My entire apartment was covered in freshly inked invites, except for a tiny trail for me to walk (pictures of this are on my missing memory card, which I will post when I find it). The process took me a good long time, so by the time I was done, it was conveniently time for bed. After the hankies were dry, in the morning, Brian came by and ironed each one down, to lock in the ink. Each hankie had it's own unique pattern, making them all really special.
Each invite was unique
Our invites didn't stop there. We really wanted to create a vintage feel to them, so I consulted the archives at the Pasadena Public Library, to see if they had any old images of 
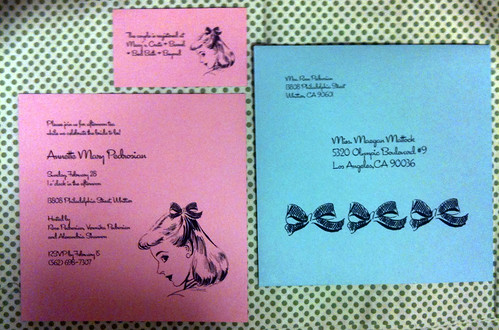
Castle Green (the venue of our wedding reception). I was conveniently interning at the Pasadena Public Library at the time, so that really helped. When we found an image we liked, I designed a post card, based on an old postcard image I saw online, changing up a few things. I included a silhouette cutout that Brian and I got done at Disneyland, which became one of the elements we repeated throughout our signage at the wedding.
Wedding Invite Ephemera
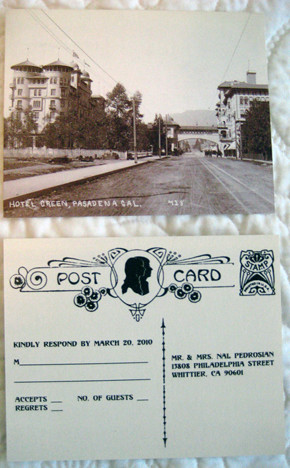
These postcards became our rsvp cards. We used a circular, fancy paperclip to attach each stamp (I couldn't pre-cover the great postage area on the postcard). It was really fun to get these back in the mail... although, many of my friends opted to keep their postcards and just let me know their responses over the phone - also good. Having these postcards is an instant keepsake of our special day, so I'll hang on to them for as long as I can.
Reception Details card
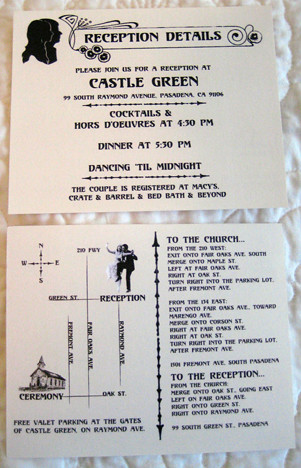
I also designed an additional postcard, which included a map and reception information.
Our Wedding Invites
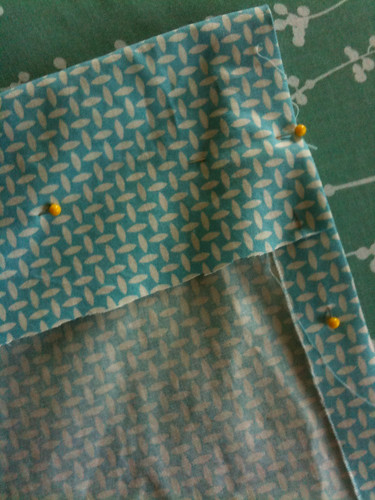
We didn't really stop there. I really love the look of lined envelopes, and I wanted to tie in our love of music, books, and libraries - especially since a lot of this was going to happen at our wedding. So, Brian went to work and cut out and glued all of our envelope liners, which we made out of old discarded music books from one of the libraries I work at. Not to worry - we didn't cut into anything valuable, I checked... and so did the librarians at my work, before discarding them.
The invite, being opened
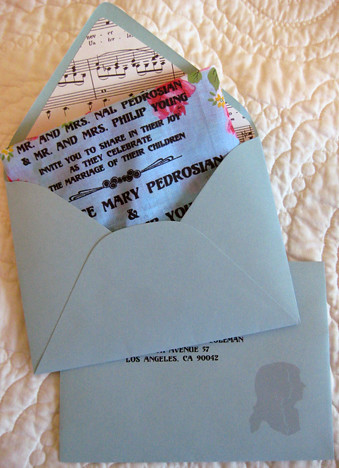
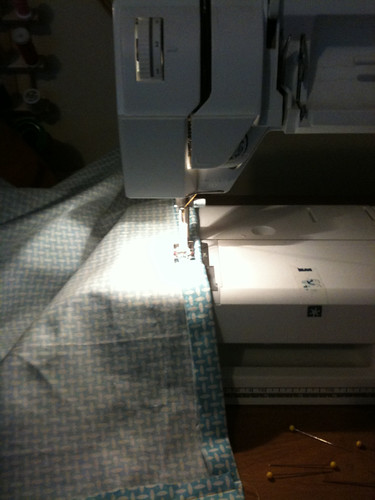
As Brian cut and lined envelopes, I was printing them, using our silhouette.
Stacked and ready to ship...
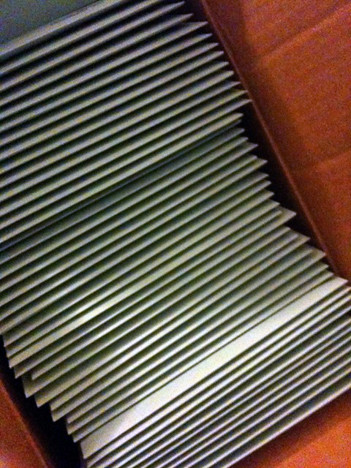
Then folding them delicately into their envelopes. We had a good 150 or so go out. Not a small task! After the wedding, we received this amazing package in the mail from our friends Rose and Danny.

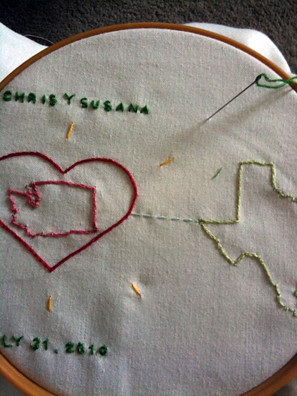
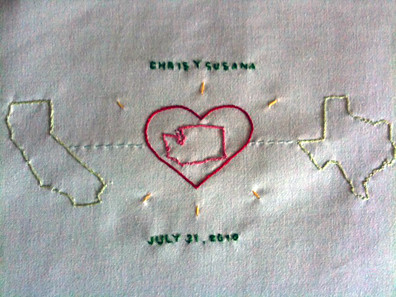
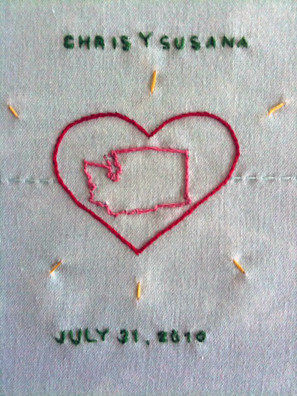
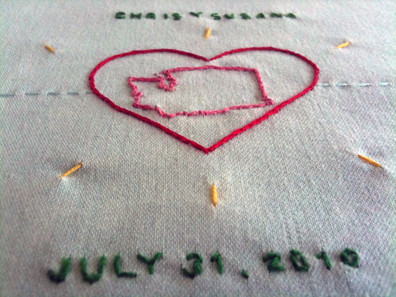
It was our invitation, turned beautifully into a pillow by the talented Salty Oat! So adorable! Notice the beautiful embroidery along the flowers... and the back of the pillow is just perfect!

This pillow is particularly exciting because we are in the process of creating a wedding quilt as well... which I will disclose more about in another post!

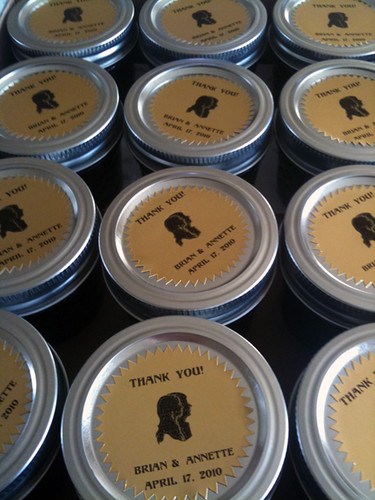
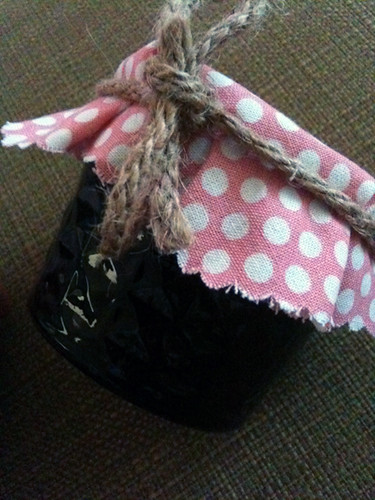
Up Next: Wedding favors.

Wednesday, July 28, 2010

Wedding Craft #1: The Shower Invites

Well, I haven't found my memory card, which holds all of my wedding crafts and pictures documenting all of the crafts we created for our wedding day.... however, I did have a few shots on my iPhone, so I'm going to start with those. Now, before the big day, were lovely showers. My moms and sisters threw me two fabulous showers, which I was given the task to make invites for one of them. Here's what I did:
My wedding shower invites
I must say, these invites are very me. I also used the same design and colors when sending everyone thank you cards (not pictured). It was really fun to create these invites. It was also good practice, since I designed and printed the wedding invites as well.

Up next: The Wedding Invites.

Tuesday, July 27, 2010

Lemon Cream Cheese Pound Cake

Pound Cake and coffee
We haven't had many guests over since we've moved in. While we thought we'd have plenty of time after all of the wedding madness, we really haven't had much time to organize our new home. But, have you ever noticed that when you invite guests over, sometimes that's all it takes to get the place in order? This past weekend, we decided to put it to the test. We invited Brian's family over and got super busy with our cleaning. They really wanted to to have dinner at The Oinkster down the street, so I offered to make some coffee and dessert. I needed to make something with very little hands on-time, so I went with this recipe, for pound cake. Because I am so into my micro grater lately, I added some lemon zest and used reduced fat cream cheese. Of course, when you use 1.5 cups of butter... what difference does that really make?
Butter and Lemon Zest
I creamed together the butter, cream cheese and zest, until it was nice and smooth.
Creaming together butter, cream cheese and lemon zest
I then added sugar, eggs, vanilla, and flour.
Pound Cake batter
I gotta say, the batter was fabulous. (I know, you're not supposed to taste batter with raw eggs...but...ehh... I can't help it.) The taste of this batter really took me back to being a little kid and tasting the batter of my grandma's Beerok (pronounced: b-row-ck). I couldn't find a thing about Beerok online, but it's this amazing Armenian/Russian pastry which I can only describe as pastry bars with apricot jam. I knew this was going to be a good cake.
Pre Oven Pound Cake
What I didn't realize when i decided to use this recipe is the 80 minute baking time. I had to delay our dinner plans by about 20 minutes, in which we started to watch Fantastic Mr. Fox. With lots of hungry people in the living room waiting, I may have rushed the cake out of the oven a few minutes early, but it was still pretty good.
Pound Cake, fresh out of the oven
It was halfway gone within minutes.
Pound Cake, half eaten
Even though I took it out a tad too early, no one seemed to mind.
Very dense pound cake, with lots of crumbles
The cake itself was so rich and dense that it almost tasted creamy. The touch of lemon zest also really gave this cake a summary feel, perfect with some fresh fruit, or my homemade coconut ice cream.
Pound Cake, extreme close up
Our bellies couldn't be fuller and our home is finally starting to come together. Family, food, and lots of lemon zest... what else can a girl ask for?

Monday, July 26, 2010

Chocolate Chip Banana Bread

Banana chocolate chip bread
Last week I showed you what I did with all of my extra ice cream egg whites and today I will show you what I did with all of my extra banana pudding ice cream bananas. Since the bananas had already gotten really ripe, that left me almost no choice, but to make banana bread. I used this recipe, with a slight modification of the chocolate chip persuasion.
Smashing bananas for Banana chocolate chip bread
I added brown sugar, vanilla, butter, and eggs to the bananas. In a separate bowl, I mixed my dry ingredients of flour, salt, and baking soda.
Dry ingredients for Banana chocolate chip bread
I slowly combined the wet ingredients with the dry, added my chocolate chips and prepared for baking.
Banana chocolate chip bread, pre-oven
Our home smelled so wonderful while this was in the oven, if felt like the baking process took forever.
Banana chocolate chip bread
Brian and I somehow polished half of this loaf off in one night. I think the chocolate chips had something to do with it!

Coming soon, the most amazing pound cake I have ever baked! Well... the only pound cake I have ever baked, but it was amazing!

Also, I have still not found my missing memory card, but wedding crafts will be posted soon, with or without the card!

Friday, July 23, 2010

New Curtain

It was easy, less than $10, and all done in under 30 minutes!
Curtain, after
Our curtain wasn't always so cheerful and bright. When we moved in, this is what we were given:
Before
Since I spend so much time in this kitchen, I wanted something a little happier. I went with this bright blue fabric, to go with our blue Kitchenaid products.
Fabric for new curtain
After I measured, I ironed..
Ironing and pinning
...and pinned...
Pinning
... and sewed...
Sewing
...and done. I used a yellow thread to contrast, since we use mostly yellow dish cloths.
Curtain close up
A quick fix under 30 minutes and for under $10!

Thursday, July 22, 2010

Coconut Meringues (Or What To Do With Lots Of Egg Whites)

Coconut Vanilla Chewy Meringues
After making all of that ice cream last week, I had 6 egg whites just waiting for some purpose.
Leftover egg whites, from ice cream making
I couldn't decide, Angel Food Cake or Meringues? I put on Food Network for some inspiration, and it must have been a sign, but Giada De Laurentiis was making meringues! I immediately consulted with my copy of Joy of Cooking and decided to make a cross between what Giada did and what was written in Joy of Cooking, but then kind of something totally different at the same time. It all started with a little whipping of the eggs.
Whipped egg whites
At this point, I added a pinch of salt and kept whipping. The salt breaks down the egg whites and allows them to better absorb the sugar. I had 6 egg whites, so I added approximately 1.5 cups of sugar.
Whipping egg whites, adding a little bit of salt, sugar, vanilla extract, coconut extract, and cream of tartar
You want to make sure you use extra fine sugar. Luckily, I had some on hand, but if you don't, you can make it extra fine by putting your granulated sugar in the food processor for a little bit. The smaller the granules, the less they weigh the egg whites down, while baking. Also added to the mix was cream of tartar, a bit of vanilla extract, coconut extract, and lemon zest (I add lemon zest to everything). Since I had so much coconut flavoring leftover from ice cream making, at the last minute I decided to make these Coconut Meringues.
Adding some shredded coconut
Once the egg white mixture reached stiff peaks, I blended in the shredded coconut, just until mixed in evenly. Now, normally I would pipe these into adorable rounds, but I was tired and Giada said it looks really cool when you just spoon 'em on to your parchment. Who am I to disagree with Giada? Did I mention I was also really tired?
I formed little rounds with peaks, simply with a spoon
Now this not the cookie you'd want to make if you're in a hurry for a snack. These bad boys take a while to bake and cool. I had mine in the oven at around 200 degrees for about 2+ hours.
Before the oven
I made two batches, some with coconut shreds on top, some without. After baking them for a few hours, I let them cool for a few hours.
After chilling overnight, they just peeled right off the parchment..
They weren't the average meringue. They were different. I think they were better different, kinda chewy and gooey different. Most meringues I've had are harder and crunchy. I think I prefer my chewy gooies, but that's just me. My guess is that if I baked them longer, I would have the hard, crunchy, commercially accepted texture. Either way, a very fun time in the kitchen and yummy coconut smells in the apartment.